$q.capacitor($q.capacitor)
在使用 Capacitor 模式开发移动应用时,你可以在 Vue 文件中访问 $q.capacitor。这是全局 Capacitor 对象的别名。
¥While you are developing a Mobile App with Capacitor Mode, you can access $q.capacitor in your Vue files. This is an alias to the global Capacitor Object.
Android 技巧(Android Tips)
¥Android Tips
Android 远程调试(Android remote debugging)
¥Android remote debugging
如果你正在调试 Android 应用,你可以通过连接到 Android 手机/平板电脑的 USB 数据线使用 Google Chrome 远程调试。也可以用于模拟器。
¥If you are debugging Android Apps, you can use Google Chrome Remote Debugging through a USB cable attached to your Android phone/tablet. It can be used for emulator too.
这样,你就可以直接在模拟器/手机/平板电脑上运行你的应用,并使用 Chrome 开发者工具。检查元素、控制台输出等等。
¥This way you have Chrome Dev Tools directly for your App running on the emulator/phone/table. Inspect elements, check console output, and so on and so forth.


接受许可(Accept Licenses)
¥Accept Licenses
如果你在完成 Android 构建时遇到问题,并且看到类似以下消息:
¥If you are having problems getting Android builds to finish and you see a message like:
> Failed to install the following Android SDK packages as some licenses have not been accepted.如果是这种情况,你需要接受所有许可证。幸运的是,有一个工具可以实现这一点:
¥If this is the case you need to accept ALL the licenses. Thankfully there is a tool for this:
Linux:
sdkmanager --licensesmacOS:
~/Library/Android/sdk/tools/bin/sdkmanager --licensesWindows:
%ANDROID_SDK_ROOT%/tools/bin/sdkmanager --licenses
安装 SDK 后未找到 Android SDK(Android SDK not found after installation of the SDK)
¥Android SDK not found after installation of the SDK
警告
环境变量 ANDROID_HOME 已被弃用,并被 ANDROID_SDK_ROOT 取代。根据你的 Android Studio 版本,你可能需要其中之一。同时设置两者也无妨。
¥The environmental variable ANDROID_HOME has been deprecated and replaced with ANDROID_SDK_ROOT. Depending on your version of Android Studio you may need one or the other. It doesn’t hurt to have both set.
一些较新的基于 Debian 的操作系统(例如 ubuntu、elementary OS)在你安装并(正确)配置环境后,可能会留下 Android SDK not found.。
¥Some newer Debian-based OS (e.g. ubuntu, elementary OS) might leave you with a Android SDK not found. after you installed and (correctly) configured the environment.
这可能有两个不同的原因:通常是路径配置不正确。第一步是验证你的路径是否设置正确。这可以通过运行以下命令来实现:
¥This could have two different reasons: Usually the paths aren’t configured correctly. The first step is to verify if your paths are set correctly. This can be done by running the following commands:
$ echo $ANDROID_HOME

# or

$ echo $ANDROID_SDK_ROOT预期输出应为类似于此 $HOME/Android/Sdk 的路径。运行后:
¥The expected output should be a path similar to this $HOME/Android/Sdk. After this run:
$ ls -la $ANDROID_HOME

# or

$ ls -la $ANDROID_SDK_ROOT确保文件夹包含 SDK。预期输出应包含类似 ‘tools’、‘sources’、‘platform-tools’ 等文件夹。
¥To ensure the folder contains the SDK. The expected output should contain folders like ‘tools’, ‘sources’, ‘platform-tools’, etc.
$ echo $PATH输出应包含 Android SDK ‘tools’ 文件夹和 ‘platform-tools’ 工具的每一个条目。它可能看起来像这样:
¥The output should contain each one entry for the Android SDK ‘tools’-folder and ‘platform-tools’-tools. This could look like this:
/home/your_user/bin:/home/your_user/.local/bin:/usr/local/sbin:/usr/local/bin:/usr/sbin:/usr/bin:/sbin:/bin:/usr/games:/usr/local/games:/home/your_user/Android/Sdk/tools:/home/your_user/Android/Sdk/platform-tools如果你确保路径设置正确,但仍然出现错误,你可以尝试以下修复方法:手动替换 Android Studio ‘tools’ 文件夹
¥If you ensured your paths are set correctly and still get the error, you can try the following fix: Replacing the Android Studio ‘tools’ folder manually
Android Studio(Android Studio)
在 Android Studio 中(如果你在 /src-capacitor/android 上打开它),你将收到一条建议升级 Gradle 版本的消息。请勿升级 GRADLE,因为它会破坏 Capacitor 项目。其他任何请求的升级也相同。
¥In Android Studio (if you open it on /src-capacitor/android), you will be greeted with a message recommending to upgrade the Gradle version. DO NOT UPGRADE GRADLE as it will break the Capacitor project. Same goes for any other requested upgrades.

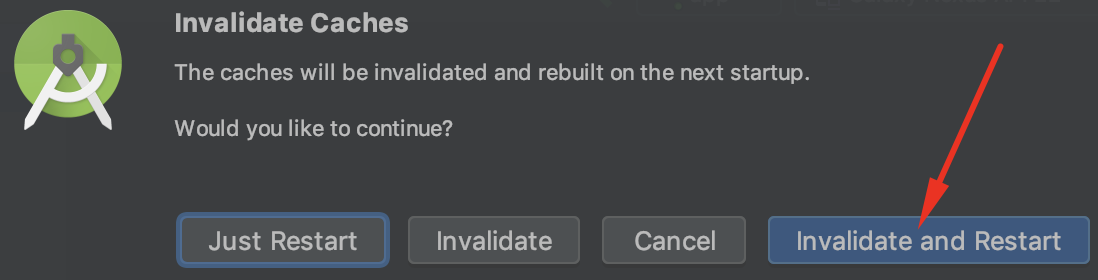
如果你遇到任何 IDE 错误,请点击“文件”>“使缓存无效”,然后重新启动。
¥If you encounter any IDE errors then click on File > Invalidate caches and restart.
在 Linux 上设置设备(Setting up device on Linux)
¥Setting up device on Linux
当你尝试直接在 Android 手机/平板电脑上运行你的应用时,你可能会遇到 ?????? no permissions 问题。
¥You may bump into ?????? no permissions problem when trying to run your App directly on an Android phone/tablet.
以下是修复此问题的方法:
¥Here’s how you fix this:
# create the .rules file and insert the content
# from below this example
sudo vim /etc/udev/rules.d/51-android.rules
sudo chmod 644   /etc/udev/rules.d/51-android.rules
sudo chown root. /etc/udev/rules.d/51-android.rules
sudo service udev restart
sudo killall adb51-android.rules 的内容:
¥The content for 51-android.rules:
SUBSYSTEM=="usb", ATTRS{idVendor}=="0bb4", MODE="0666"
SUBSYSTEM=="usb", ATTRS{idVendor}=="0e79", MODE="0666"
SUBSYSTEM=="usb", ATTRS{idVendor}=="0502", MODE="0666"
SUBSYSTEM=="usb", ATTRS{idVendor}=="0b05", MODE="0666"
SUBSYSTEM=="usb", ATTRS{idVendor}=="413c", MODE="0666"
SUBSYSTEM=="usb", ATTRS{idVendor}=="0489", MODE="0666"
SUBSYSTEM=="usb", ATTRS{idVendor}=="091e", MODE="0666"
SUBSYSTEM=="usb", ATTRS{idVendor}=="18d1", MODE="0666"
SUBSYSTEM=="usb", ATTRS{idVendor}=="0bb4", MODE="0666"
SUBSYSTEM=="usb", ATTRS{idVendor}=="12d1", MODE="0666"
SUBSYSTEM=="usb", ATTRS{idVendor}=="24e3", MODE="0666"
SUBSYSTEM=="usb", ATTRS{idVendor}=="2116", MODE="0666"
SUBSYSTEM=="usb", ATTRS{idVendor}=="0482", MODE="0666"
SUBSYSTEM=="usb", ATTRS{idVendor}=="17ef", MODE="0666"
SUBSYSTEM=="usb", ATTRS{idVendor}=="1004", MODE="0666"
SUBSYSTEM=="usb", ATTRS{idVendor}=="22b8", MODE="0666"
SUBSYSTEM=="usb", ATTRS{idVendor}=="0409", MODE="0666"
SUBSYSTEM=="usb", ATTRS{idVendor}=="2080", MODE="0666"
SUBSYSTEM=="usb", ATTRS{idVendor}=="0955", MODE="0666"
SUBSYSTEM=="usb", ATTRS{idVendor}=="2257", MODE="0666"
SUBSYSTEM=="usb", ATTRS{idVendor}=="10a9", MODE="0666"
SUBSYSTEM=="usb", ATTRS{idVendor}=="1d4d", MODE="0666"
SUBSYSTEM=="usb", ATTRS{idVendor}=="0471", MODE="0666"
SUBSYSTEM=="usb", ATTRS{idVendor}=="04da", MODE="0666"
SUBSYSTEM=="usb", ATTRS{idVendor}=="05c6", MODE="0666"
SUBSYSTEM=="usb", ATTRS{idVendor}=="1f53", MODE="0666"
SUBSYSTEM=="usb", ATTRS{idVendor}=="04e8", MODE="0666"
SUBSYSTEM=="usb", ATTRS{idVendor}=="04dd", MODE="0666"
SUBSYSTEM=="usb", ATTRS{idVendor}=="0fce", MODE="0666"
SUBSYSTEM=="usb", ATTRS{idVendor}=="0930", MODE="0666"
SUBSYSTEM=="usb", ATTRS{idVendor}=="19d2", MODE="0666"
SUBSYSTEM=="usb", ATTRS{idVendor}=="1bbb", MODE="0666"现在运行 adb devices 应该会发现你的设备。
¥Now running adb devices should discover your device.
iOS 技巧(iOS Tips)
¥iOS Tips
iOS 远程调试(iOS remote debugging)
¥iOS remote debugging
如果你正在调试 iOS 应用,你可以使用 Safari 开发者工具通过连接到 iOS 手机/平板电脑的 USB 数据线进行远程调试。也可以用于模拟器。
¥If you are debugging iOS Apps, you can use the Safari developer tools to remotely debug through a USB cable attached to your iOS phone/tablet. It can be used for emulator too.
这样,你就可以直接在模拟器/手机/平板电脑上运行你的应用,并使用 Safari 开发者工具。检查元素、控制台输出等等。
¥This way you have Safari developer tools directly for your App running on the emulator/phone/table. Inspect elements, check console output, and so on and so forth.
首先在 Safari 的“设置”中启用 “developer” 菜单选项。然后,如果你导航到 “developer” 菜单选项,你将在顶部附近看到你的模拟器或连接的设备。从这里你可以打开开发者工具。
¥First enable the “developer” menu option in the Settings of Safari. Then if you navigate to the “developer” menu option you will see your emulator or connected device listed near the top. From here you can open the developer tools.
状态栏和凹槽安全区(Status bar and notch safe-areas)
¥Status bar and notch safe-areas
由于手机具有状态栏和/或刘海,因此在 Capacitor 上构建时,你的应用的样式可能需要进行一些调整。为了防止应用的某些部分隐藏在状态栏后面,可以使用一个全局 CSS 变量来创建 “safe-area”。此变量可以应用于应用的顶部和底部填充或边距。
¥Since mobile phones have a status bar and/or notches, your app’s styling might need some tweaking when building on Capacitor. In order to prevent parts of your app from going behind the status bar, there is a global CSS variable that can be used for creating a “safe-area”. This variable can then be applied in your app’s top and bottom padding or margin.
Quasar 在 QHeader/QFooter 和 Notify 中默认支持这些 CSS 安全区域。但是,务必在多个模型上检查 Capacitor 构建,以确保应用的所有用例是否都正确处理了安全区域。
¥Quasar has support for these CSS safe-areas by default in QHeader/QFooter and Notify. However it’s important to always check your Capacitor build on several models to see if all cases of your app are dealing with the safe areas correctly.
如果你需要手动调整 CSS,可以使用以下方法:
¥In cases you need to manually tweak your CSS you can do so with:
// for your app's header
padding-top: constant(safe-area-inset-top) // for iOS 11.0
padding-top: env(safe-area-inset-top) // for iOS 11.2 +
// for your app's footer
padding-bottom: constant(safe-area-inset-bottom)
padding-bottom: env(safe-area-inset-bottom)当然,你也可以根据你的应用,使用上述示例,并使用 margin 代替 padding。
¥Of course you can also use the above example with margin instead of padding depending on your app.